DIY Worm Farm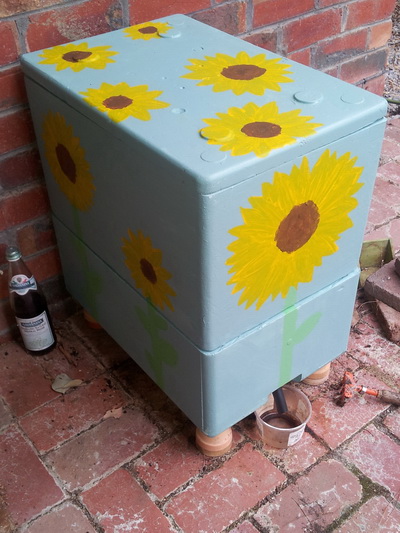
WHAT YOU’LL NEED
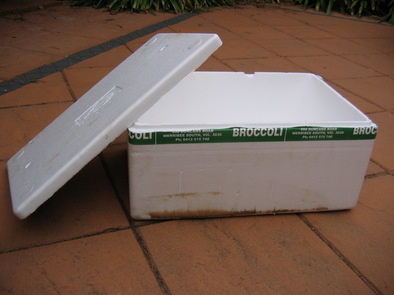
- 2 x white polystyrene broccoli boxes + one lid, such as those used in fruit shops. These have no holes and come with lids which fit snuggly.
- Some small stones or screenings for drainage.
- Some insect screening or shadecloth. This is to stop the worms dropping into the layer collecting the worm “wee”.
- A short length of old garden hose (10cm) can be used to collect the liquid wee.
- Worms need some sort of “bedding” material. These should be mainly carbon-based materials, and the easiest is shredded newspaper. Mix it together with some aged (not fresh) animal manure or compost and then lightly sprinkle it all with some fresh water. Don’t wet it too much – just enough to dampen the contents. This should all be prepared before you bring your new worms home.
- A cover (“worm blanket”) for the bedding cut to fit squarely in the box is needed. A piece of hessian or a thick layer of wet newspaper will do on top of the bedding. It is under this layer that you add your food scraps.
- Silicone glue gun
- A container (eg margarine) to collect the worm wee.
- WORMS! You can buy them in starter boxes of 1000. You will need at least this amount to start. Ordinary garden variety worms won’t do. Worms do best in the situation into which they were born and the bedding and food you add will be too rich for garden worms. Instead, purchase composting worms.
TOOLS
- Scissors
- Texta
- Stanley knife
- Ruler
- Screwdriver
PUTTING IT TOGETHER
Make the Top Box. Put lots of holes (pencil thickness) with the screwdriver on the bottom of ONE of your boxes.
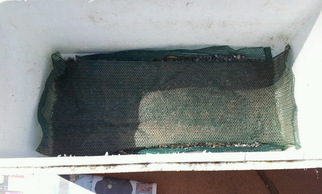
Measure and cut 2 pieces of insect mesh/shadecloth to fit the base of the box.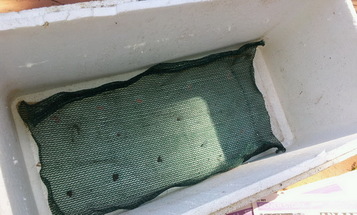
Line the box with the one of the pieces. Place a 2cm layer of small stones (screenings) over the screening and then cover with another piece of the insect mesh or shadecloth.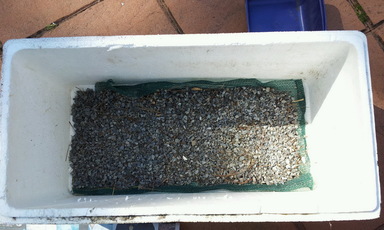
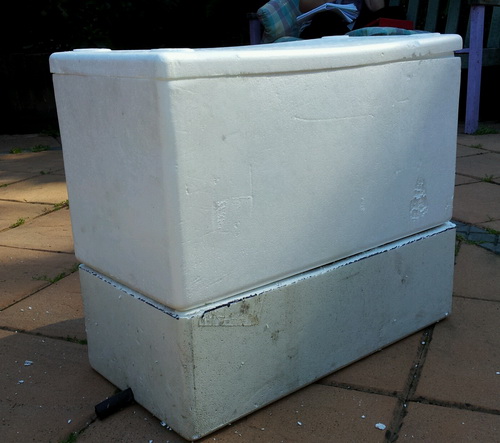
Make the Bottom Box. This box does not need to be kept at its full height. Carefully measure around and mark it with a texta so that you can use the Stanley knife to cut through the polystyrene.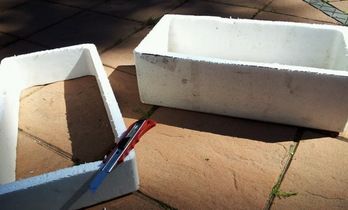
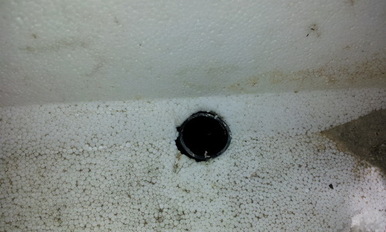
Make a hole, with the screwdriver, in the middle of the base of one of the short sides. Fit the hose length into this hole and ensure that the inside end of the hose is flush with the base of the box on the inside. Secure it in place with the silicone gun.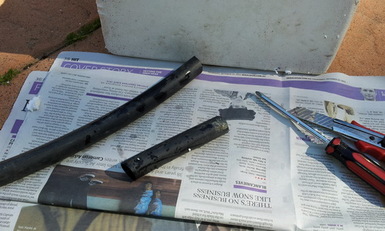
 Bedding material. Fill your TOP BOX, over the shadecloth/screenings layer, about 3/4 full with the prepared newspaper/compost or manure mix.
Add your worms to your bedding and watch as they wriggle down out of sight. Place the box with the worms on top of the base box, which will allow the water and worm wee to drain down into the base. Prop the boxes up on bricks or similar so that you can place a container under the hose to catch the “worm wee”.
NOW wait patiently for a week before adding food.
Next, add some food scraps to the bin. Make sure you don't overfeed your worms. Start by putting a small amount in one corner underneath your worm blanket. See how long it takes your worms to break it down. This should give you an idea of how much your worms can handle at one time.
You are now the proud manager of your own farm – a worm farm!
Separating the vermicast (worm poo) from the worms in your worm farm